Step 5. Calibration
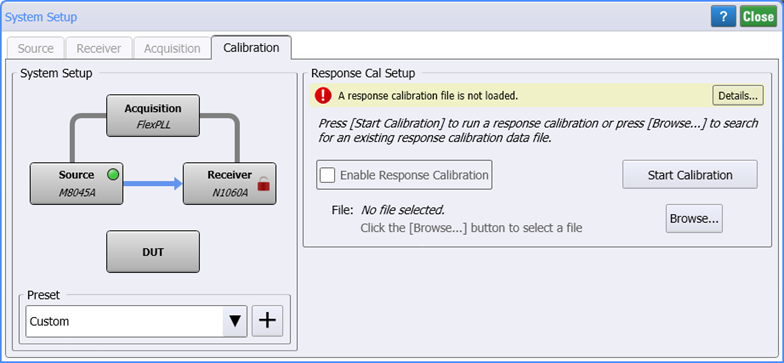
Use the System Setup dialog's Calibration tab to perform a Response Calibration and, if needed, a Receiver module's clock recovery calibration. The Receiver module calibration is only presented if FlexPLL determines that the calibration is needed.
- To learn more about the dialog's Calibration tab.
- Click Setup > Source Setup and select the Calibration tab. Or, click the Calibration button located at the bottom of the application.
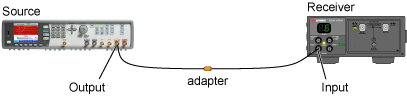
- In the test setup, place an adapter between the source and the receiver cables where the DUT would normally be connected. This is shown in following figure.
- Ensure that the settings in the Source Setup tab are correct and that Output Enable is selected.
- Ensure that the settings in the Receiver Setup tab are correct.
- Click Start Calibration.
-
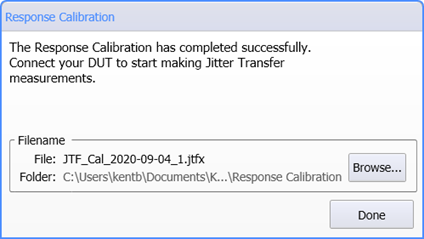 When the Calibration completes and this dialog appears:
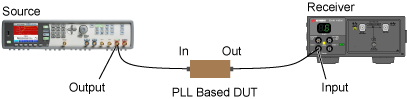
 - Replace the adapter with your DUT in the test setup and turn the DUT on.
- Click Done to close the dialog. After a short pause, FlexPLL prepares the measurement and attempts to lock the Receiver's clock recovery. Shortly thereafter the calibrated JTF measurement sweeps begins.
- If the DUT's output symbol rate is different than the DUT's input symbol rate:
- Open the System Setup dialog's Receiver tab and enter the correct Symbol Rate for when the DUT is in the test setup.
- Click the dialog's Lock button
 to lock the receiver's clock recovery to the correct symbol rate.
For more information about situations where the DUT's input and output symbol rates differ, read User Tips!.